So you are an intraday trader! You prefer to take small profits when the markets give you an opportunity and you are content with keeping your trades open over a short period of time. While the conventional charts such as Candlesticks, Bar Chart or Line chart might not be offering you a good amount of success, the Renko scalping system makes for a simple and a profitable trading strategy. Of course, this simple Renko scalping system is by no means the Holy Grail and this system is also susceptible to losses. However, the odds of achieving a high probability of success comes with a few rules being added to the general scalping rules governing this Renko trading system. Traders need to be quick in order to trade the signals using this simple Renko scalping system. You will also need to be very familiar with the concept of divergence. Last but not the least, mind the spreads as this simple Renko scalping system involves trading on a smaller Renko box size chart. This method works on bigger Renko box sizes as well with the only difference being that the trade set ups are not that often.
Simple Renko Scalping System – Chart Set ups
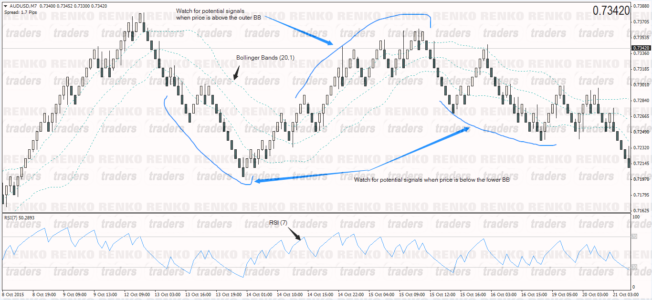
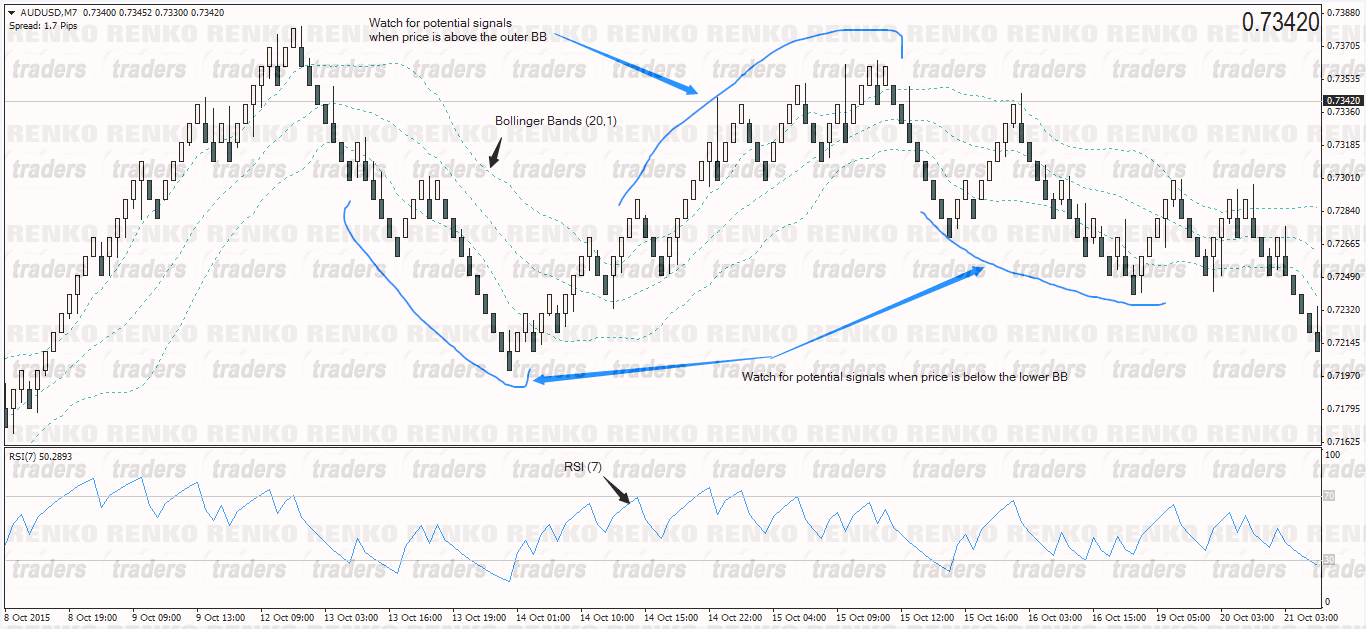
The indicators used in this simple Renko scalping system is a 10 Pip fixed Renko box, Bollinger bands (20, 1) and RSI (7, close) with levels of 71 and 29
Look for potential trade set ups when you see a divergence when prices trade above or below the outer Bollinger bands. In other words, when prices are trading outside the upper Bollinger Band, look for bearish divergence to the RSI (7) and when prices are trading below the lower Bollinger Band, look for bullish divergence to the RSI(7).
[Learn More about divergence: Awesome Oscillator Divergence | Divergence with Trend lines]The chart below illustrates the simple Renko scalping system method.
Renko Scalping System – IMPORTANT RULES
- In this simple Renko scalping system, there is another very important rule. You only place pending orders, which ‘MUST’ be triggered within the next two Renko boxes. If your trade is not triggered, the orders must be deleted
- You never enter at market as that would be a recipe for disaster
- On average, the risk/reward set up is usually 20 pips risk with a 40 or a 60 pip reward. In other words, this simple Renko scalping system offers a 1:2 or 1:3 risk/reward set up
Renko Scalping System – Buy/Sell Signals
Buy Signal Set up:
- Price is trading outside or below the lower Bollinger Band (20,1)
- Look for bullish divergence to RSI (7) [e: Price makes a lower low but RSI makes a higher low]
- Place a pending buy order at the most recent high prior to the low
- Place stops at the low
- Set take profit to the first low formed in the divergence set up
- If trade is not triggered within two Renko bars, delete the order and move on
Note: When RSI makes a higher low (while price makes a lower low), the RSI’s low must be above 29
Sell Signal Set up:
- Price is trading outside or above the upper Bollinger Band
- Look for bearish divergence to the RSI [e: Price makes a higher high but RSI makes a lower high]
- Place a pending sell order at the most recent low prior to the high
- Place stops at the high
- Set take profit to the first high formed in the divergence set up
- Delete order if not triggered within the next two Renko bars
Note: When RSI makes a lower high (while price makes a higher high), the RSI’s high must be below 71
And finally, when the divergence set up occurs, (price: high, higher high and RSI: high, lower high), the price at both the highs must be outside the outer BB. Similarly, when price: low, lower low and RSI: low, higher low, the price must be below the lower Bollinger band.
Renko Scalping System – Buy/Sell Examples

- In the above chart set up, price makes a lower low but Stochastics makes a higher low above 29
- Prices are outside the lower Bollinger band, making this an ideal set up to trade
- Long positions are placed at the high with stops at the low and take profit set to the first low formed on chart
- As you can see, prices triggered the pending BUY order and quickly moved to the take profit level

- In the above chart, prices are trading outside the upper Bollinger band
- Stochastics makes a bearish divergence with the lower high below 71
- Sell entry is placed at the low with stops at the high targeting the first high of the divergence set up

- The above chart shows a false buy signal
- Here, although Stochastics met the rules, prices formed a divergence inside the (lower) Bollinger band
- The same holds true on a bearish divergence if prices were inside the (upper) Bollinger Band

- In the above chart, Stochastics met the criteria and so did price (making the higher high above the upper Bollinger band)
- However, price didn’t pull back to the entry area and instead continued to close lower, therefore the sell order is deleted
Renko Scalping System – Conclusion
As you can see, the above Renko Scalping system is one of the most versatile and simple trading system that can be used. If you follow the rules mentioned on the chart, you can expect to make decent profits with the trade set ups coming up with a minimum of 1:2 risk/reward set up. Put in your own money management and the Renko scalping system will ensure that your winners outrun your losses.
Got questions? Comment below and let me know if this system works for you or not.