
I was a bit too early in my previous analysis of AUDJPY and the trade in fact chugged along to make new highs. That said, I got back to looking at AUDJPY and currently the Renko technical analysis makes for an interesting puzzle, especially if we combine the different strategies mentioned in the Renko Strategies section.
So what’s cooking with AUDJPY and what makes it such as an interesting puzzle?
First, we look to the 25 pip AUDJPY fixed pip Renko chart shown below. For the sake of clarity, I’ll mention all points as a bullet list.
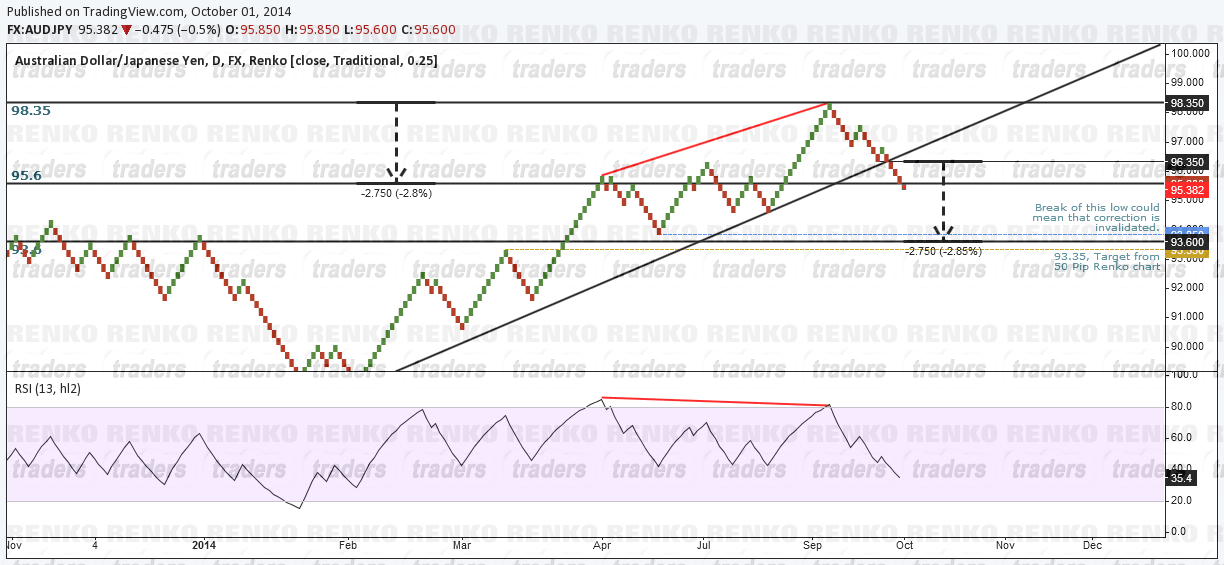
- Price broke the long term trend line and is trading near a support zone, so we could expect a retracement back to the break out zone at 96.35
- Based on the trend line break method, if price does retrace back to 96.35, we get the downside target to 93.6
- The problem with 93.6 is that it is 25 pips below the lowest low of the divergence, marked on the chart
- We know that when price breaks the low, there is a good chance for the correction to fail and thus price could head lower.
- This means two things
- Price will reach the low of 93.6, invalidate the divergence set up
- Price will fail to reach the low of 93.6, the target of the trend line break method and therefore the divergence set up will be valid
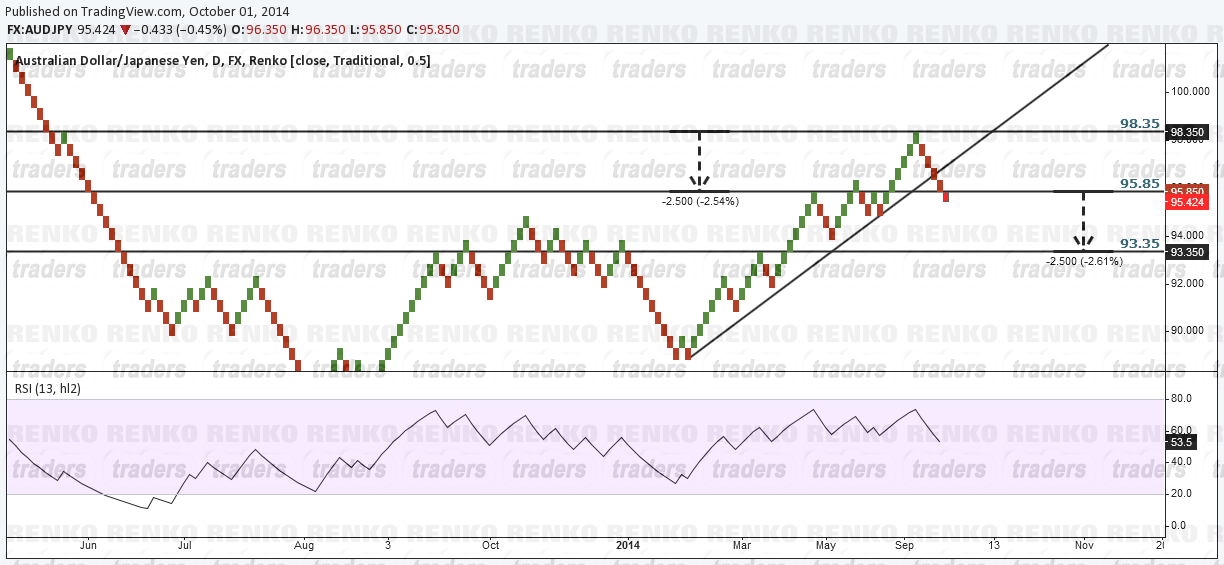
Now the puzzle gets interesting when we zoom into a 50 Pip Renko chart for AUDJPY
Here, we find the same pattern playing out, the trend line break method. What’s interesting in this method is that the break out of the trend line gives a downside target to 93.35, which forms a good support level as can be seen in the first chart above.
So this brings to question.
- Will AUDJPY invalidate the divergence set up and target 93.35 and drop to more lows?
- Or will AUDJPY invalidate the trend line break method reversing before 93.35?
- Or will AUDJPY break to 93.35, and resume its uptrend?
As I said, this is quite a puzzle that’s worth keeping an eye on.