
Tradingview.com has become one of the most popular charting destinations for traders in the technical analysis community. For those of you who do not know what tradingview.com is all about, you should simply head over there and take a look for yourself.
However, mind you that if you have never heard about tradingview.com, chances are that you are either completely new to day trading or you have been living under a rock.
In this article, we will take a look at how you can set up the renko charts correctly in the tradingview.com platform. There are a few things that you need to know before you can do this.
Firstly, you will need to buy a pro subscription to tradingview.com in order to fully feel the power of the charting capabilities that come with this application, if you haven’t already.
While some of you might feel that this would be an additional expense, investing in a pro account at tradingview.com is always beneficial for the fact that you can use it as a quick reference to chart the markets anytime you need.
Furthermore, there is also an app for tradingview which can be used to download onto your smartphone or onto your tablet. If you are interested to know more about tradingview.com, click here to read our review of tradingview and renko charts. To warm up, you can try using the free online Renko chart here.
How to configure Renko charts on tradingview.com?
The first thing that you need to obviously do is to identify what trading instrument that you want to analyze. You can of course choose between forex, stocks, futures, metals or anything else that you can find interesting on thetradingview.com platform.
One of the most interesting aspects about trading with renko charts is the fact that you can utilize this charting method on just about any financial instrument that you want to analyze. However, the way you configure the renko charts depends on quite a few factors. Even the type of instrument plays a role here.
In fact, many readers often ask as to what the best renko brick size or box size is. I have often given the answer that it depends on a person to person. There is no single answer that one could give which satisfies everybody.
The main reason is because that traders need to take into account different factors before understanding what Renko boxes they should be using. Having said that, read this article to learn more about how to choose the correct box size for your renko charts.
In this article, we will not go into the details as to how to choose the correct box size but rather we will focus on the configuration and the setup of the renko chart type on thetradingview.com platform. The end of this article, you should be able to comfortably pull up any chart of your choice and easily configure the renko chart on the trading platform.
For the sake of this article, we will focus on the forex currency pair example
Configuring Forex Renko Charts on Tradingview.com
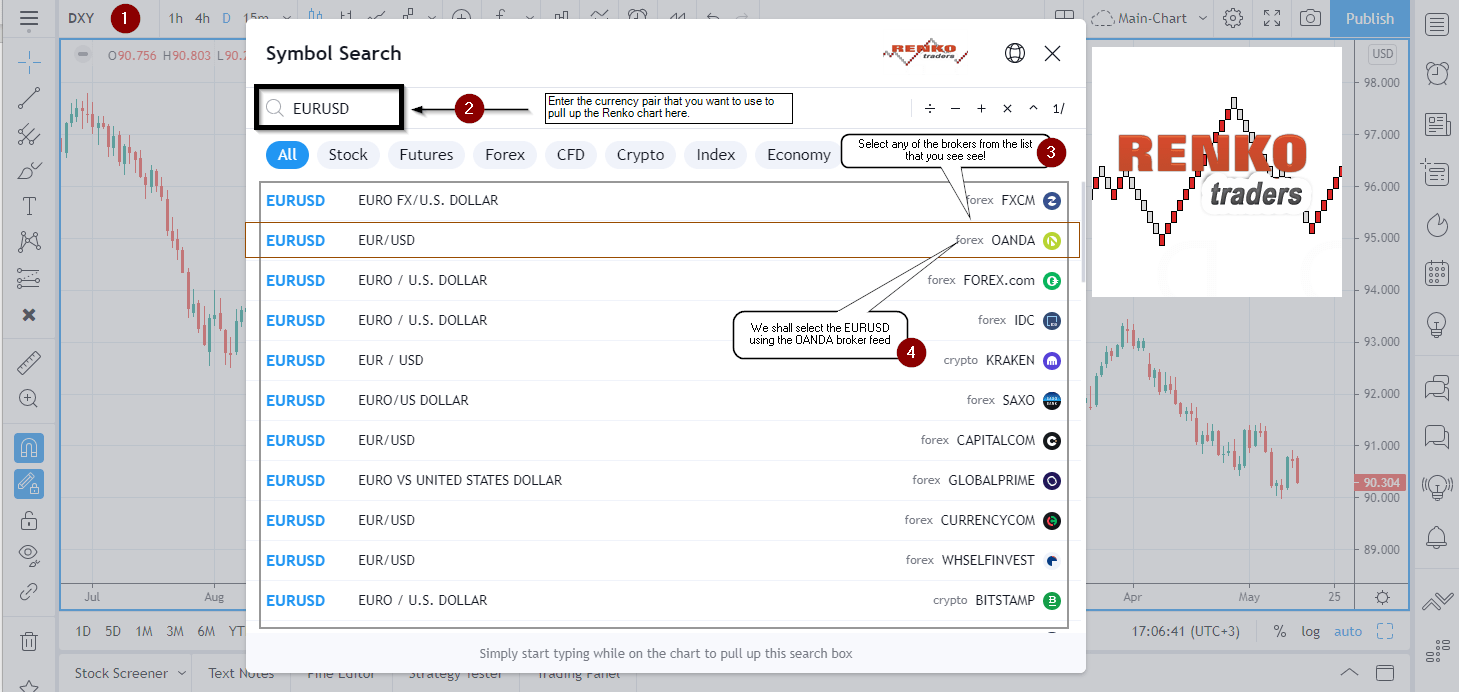
After you head onto tradingview.com, simply type in the currency pair of your choice.
In our example, we will make use of the EURUSD currency pair. Once you enter the currency pair, you will then be shown a list of drop down with different brokers. You can select anyone of your choice, it does not really matter.
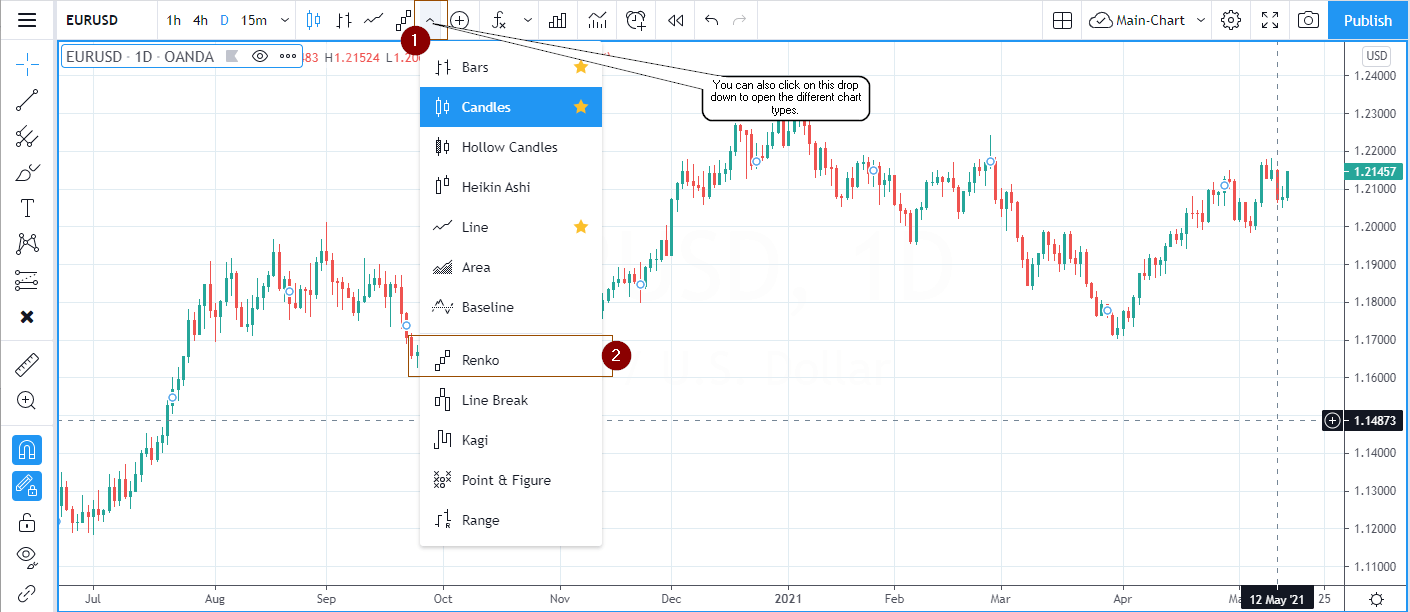
After following the above steps shown in the screenshot, you will be able to see the currency pair that you just opened. Depending on your previous settings, in all likelihood, you would be looking at either a candle stick chart or align chart or an area chart.
Following this, you should now click on the small dropdown box that you see right next to the main menu and select the renko chart from the dropdown. Below is a screenshot of how you can access the renko charts on tradingview.com in this way as well.
By default, Tradingview will open the Renko chart with an ATR (Average True Range) setting. If you wish to leave things the way they are, i.e: if you want to use your Renko chart based on the 14-period ATR you can leave it here.
But if you want to further customize your Renko chart on Tradingview, then continue further. There are two options that you can choose from here.
Changing ATR value or switching to fixed brick
To change the settings for the ATR value, right click anywhere on the chart. In the window that opens click on settings.

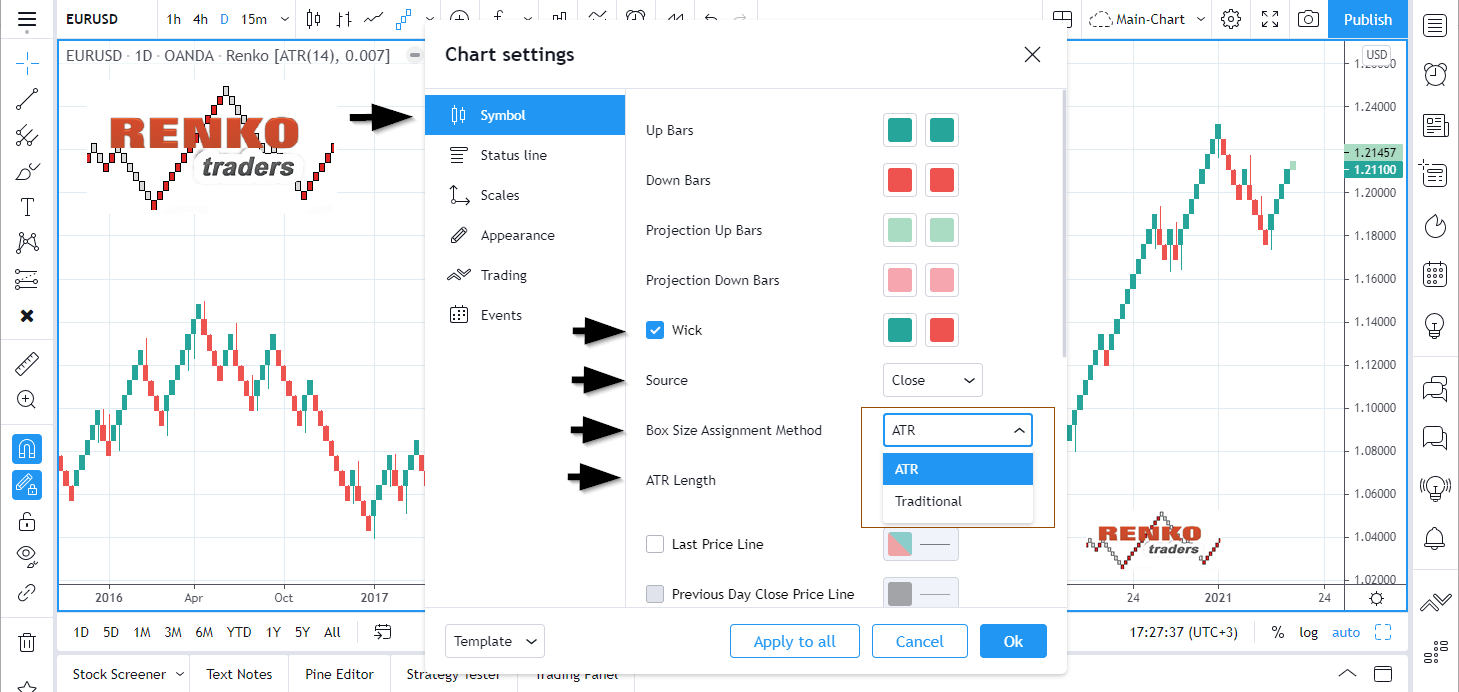
When you click on the settings tab, you will then see the chart settings window opening up. In this window, click on the symbol (the first option on the left) to opens the configuration settings.
Quick overview of the Renko chart settings and what they mean
There are a number of fields that you can configure here.
Wick: By checking or unchecking this tick box, you can have the renko charts to show the wicks or the tails for the Renko boxes. (We recommend that you leave this option checked so that you can see the actual price movement.)
Source: You can also select the drop down for the source and use the open high low or close. The general practices to make use of closing prices. Therefore, leave the source to close.
Switching between ATR and Fixed Size
Box Size Assignment Method: Using the dropdown, choose the renko charts to be plotted using ATR (average true range method) or the traditional option.
Selecting ATR: when you select the ATR box size assignment method, you have the option to select the ATR length. Remember that the number you input here, depends on the base chart timeframe that you are using.
For example, if you have the renko charts with the D timeframe enabled, and you have the ATR length of 14, it means that the Renko chart will be built based upon the 14 day ATR value for the currency pair.
You can of course switch the time frame from daily to 15 minutes. But when you do so, bear in mind that the ATR value will be automatically assigned to the time frame in question.
Selecting Traditional: and you select the box size assignment method to be traditional, then the next option you see will be the box size. Here, you can input a number of your choice. Bear in mind that the value that you assigned here needs to be in the pip format. For example, a box size of 0.0005 means that the Renko box size is 5 Pips (four decimals).
As an additional example, for any JPY currency pair, the total decimals would be two. Therefore, 0.05 pips, is the number that you would input here to set the JPY currency pair for 5 pips.
The chart below shows a comparison between the box size assignment method of using ATR or traditional.

Changing the pip size and base time frame
In our EURUSD example, we choose the box size assignment method to be traditional. And the box size is set at 0.0025. This is nothing but a 25 traditional Renko box size. The following chart is how you would view the renko charts. But we are not yet finished. This is because we need to change the base time frame.

We recommend to use an intraday timeframe such as 15 minutes or lower. This will ensure that the renko charts are more reactive to the price changes.
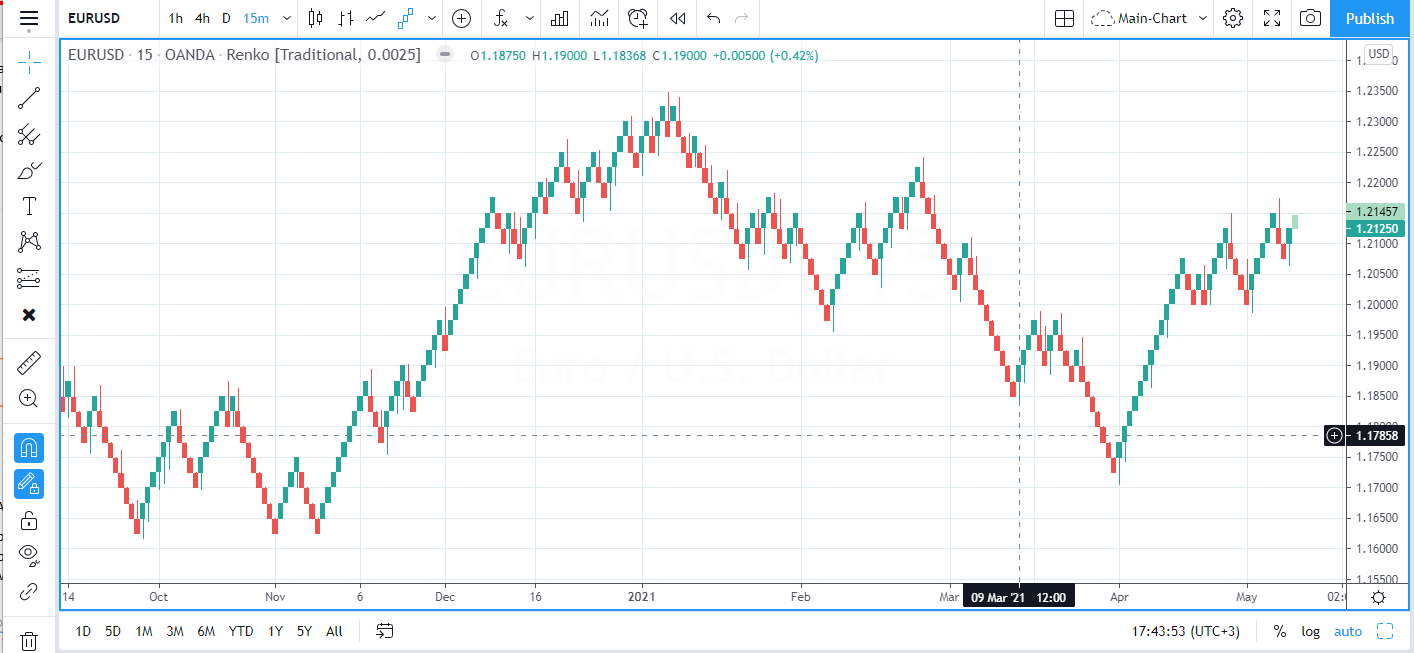
The above chart shows the final outcome when we have configured the EURUSD renko chart. In this screenshot, we use the traditional 25 pip fixed Renko box size with a 15 minute chart timeframe.
While the above process might seem long, it is in fact very easy. All it takes, is a few times to practice. And soon enough, you will find it easy to change your traditional price chart into a renko chart. What’s more, you also custom configure the renko bars of your choice in tradingview.com.
Sounds simple enough? Click here to get started!